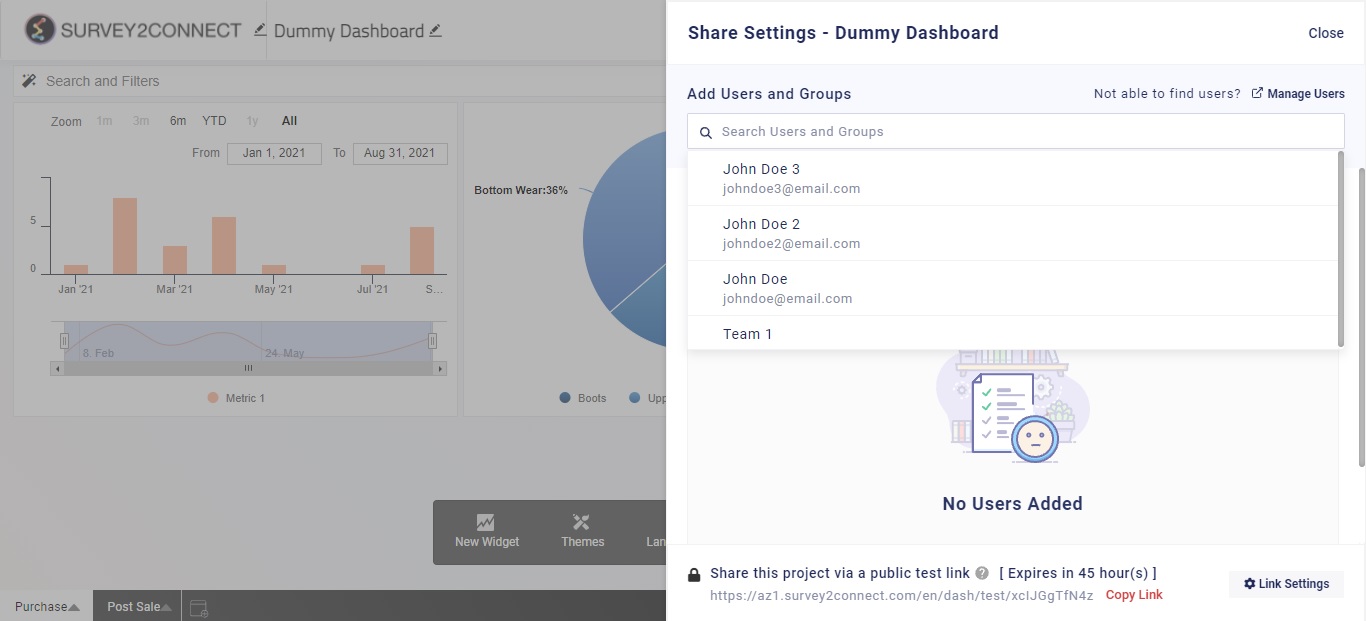
The share feature in the dashboard allows admin to share the dashboard with their users or groups. Sharing feature also includes data restriction, which limits the amount of data that would be shown to the other users based on the criteria the admin has set.
Alongside the share option, the admin also has the option to create a test link that will remain active for 48 hours once created. This share link allows the admin to share the dashboard in the read-only made by sharing the URL created. Admin can also manage the setting of the test link.
Share overview page covers all the steps you need to take in order to share your dashboard with your users.
For you to share your Dashboard data, you would need to have users in your account. In case, you don’t have users added to your account, you can do that by following these steps.
Sharing Dashboard With Users
Sharing feature allows admin to create and share the dashboard with their users by assigning them access. The three available access options are Editor, Viewer, Commentor. You can also put restrictions that would limit the data that would be shown to the user. If you want to read more about how restrictions work, click here.
The steps to sharing the dashboard are as follows:
1. Click on Share at the bottom of the screen.
2. Select Share and then on the Share screen, select the user you wish to share the dashboard with. In case if you don’t have a user added to your account, you can add them by clicking on Manage user and following these steps to adding users.
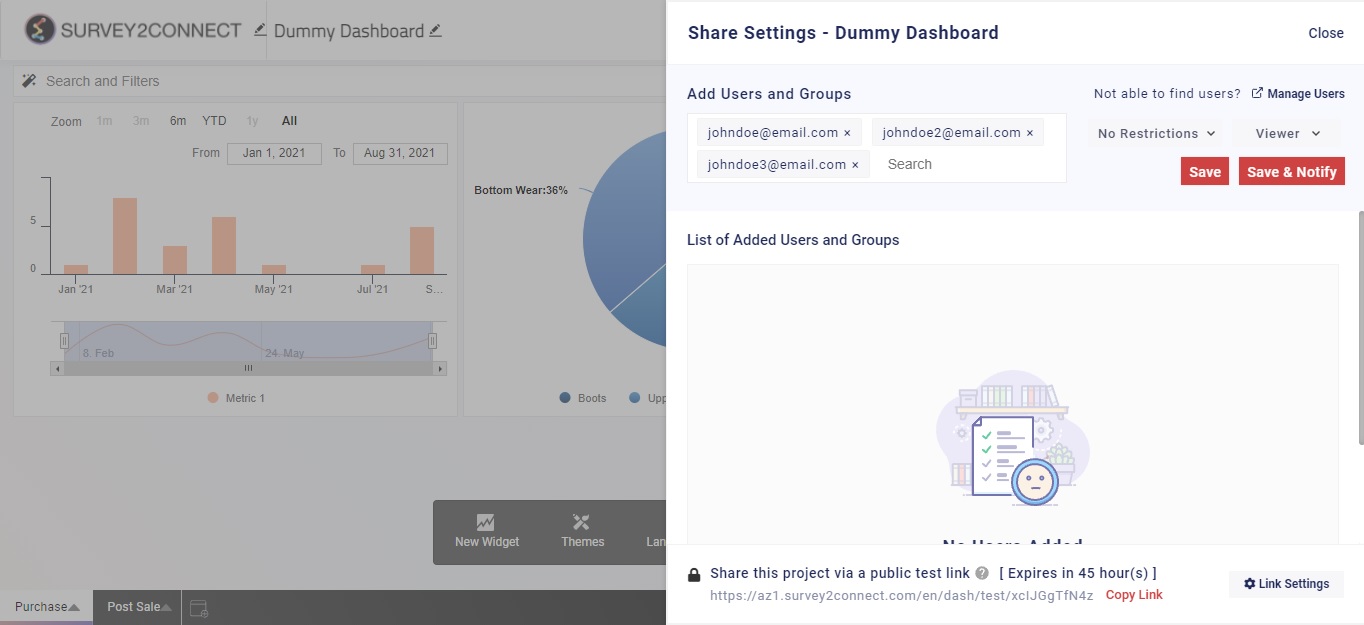
3. Once you have selected the user, click on Save to add them. You can click on Save and Notify if you want to notify your users after you have added them.
4. Once the users are added, you can add restrictions and access. If you wish to add restrictions, select the restriction from the drop-down. If you haven’t already created a restriction, you can create it by clicking on Managing restrictions and following the steps of managing restrictions. Select the access you want to provide to your user. The available options are — Viewer, Editor, and Commentor. The viewer would only be able to view the dashboard while the editor would be able to edit the widgets and data. Commentor can only comment on the dashboard and widgets.
Your dashboard is now shared with your users.
Sharing dashboard with a Public Test Link
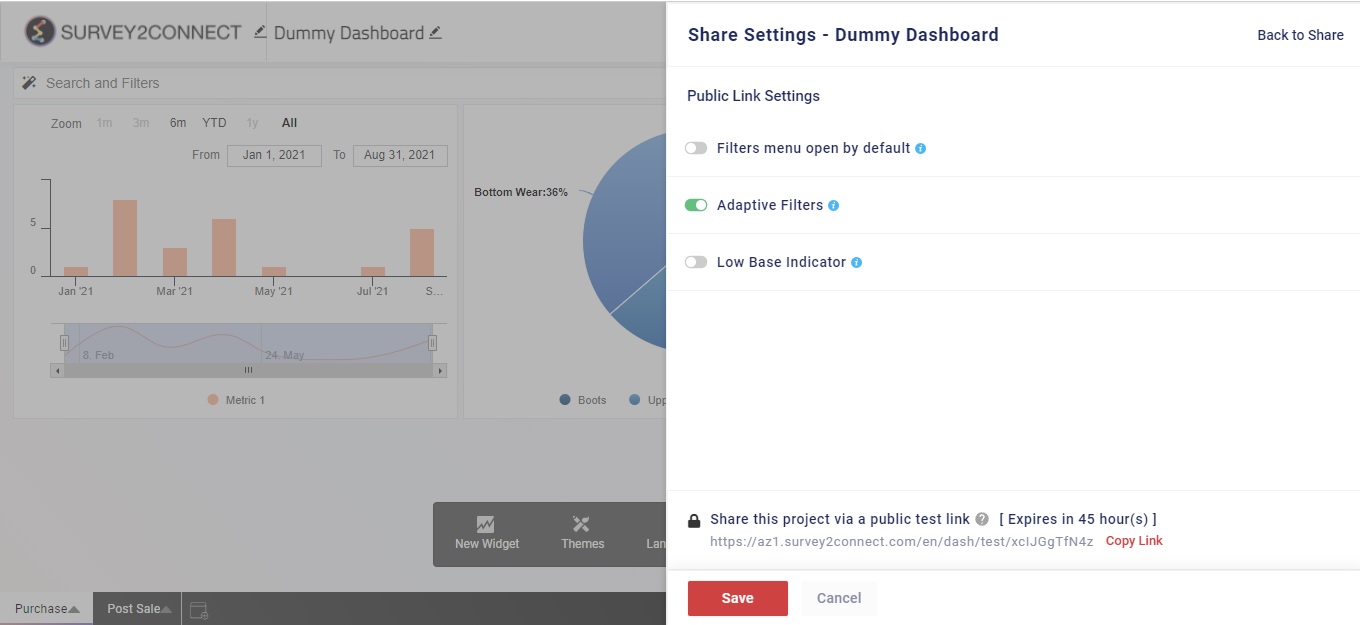
Admin can create a public test link that can be shared across teams to share the dashboard in read-only mode. This link once created, is active for 48 hours. However, every time the admin publishes the dashboard, the link gets refreshed. Admin can also customize the settings of the public test link by clicking on the setting button.
Managing Settings of Public Test Link
Filters menu open by default: When enabled, this option, would automatically open the filter menu.
Adaptive Filters: Adaptive filters are beneficial in cases where you wish to apply two filters. For example, you want to get data for users who are between 25-45 and female. Now you have applied the first filter for users between the age of 25-45. Now if you don’t have any female users between the age, the Female option won’t be shown when you search for a second filter on the basis of gender.
Low Base Indicator: With a low base indicator, you can set a number that would be the threshold for the low base. Any widget with data being less than the low base would have an indicator when the low base indicator is enabled. You can also set the message that would be shown as the indicator.
Once you have managed the settings, click on Save to save the settings. Copy the URL from the bottom and share it with the users.


