

Manage Restriction

Views
The manage restriction section is part of sharing feature of the dashboard. Using the Manage restriction option, you can put up restrictions on the dashboard you have shared. When you share the dashboard with other users, you can either share it completely or put up restrictions, that would limit how much of the dashboard would be shown to the user.
The manage restriction section allows you to set the restriction and what would be hidden based on the restriction. You can also manage the setting of the restriction. We will explore every feature in detail below.
With our dashboard feature, you have two types of restrictions available. One restriction is simply based on the page view and it would either show or hide the page from other users based on restriction. The second type is data restriction, which limits the data that would be shown to the user. In this, you create an equation and every data set under the equation would be restricted to the user with whom you share the dashboard with restriction. This acts as a filter to data shown once shared.
Let’s say you want a particular team to see only the first page of the dashboard and you want the other team to only see page 2 of the dashboard. In such a case, you can use restrictions to restrict page 2 for the first batch of users and only show page 1. Similarly, you can restrict the first page of the dashboard from the second team and only show them the second page of the survey.
From the manage restriction page, you can configure your restriction and save it with a name. While sharing the dashboard, you can select the particular restriction and share it with the restriction, if needed.
The steps to creating a restriction are as follows:
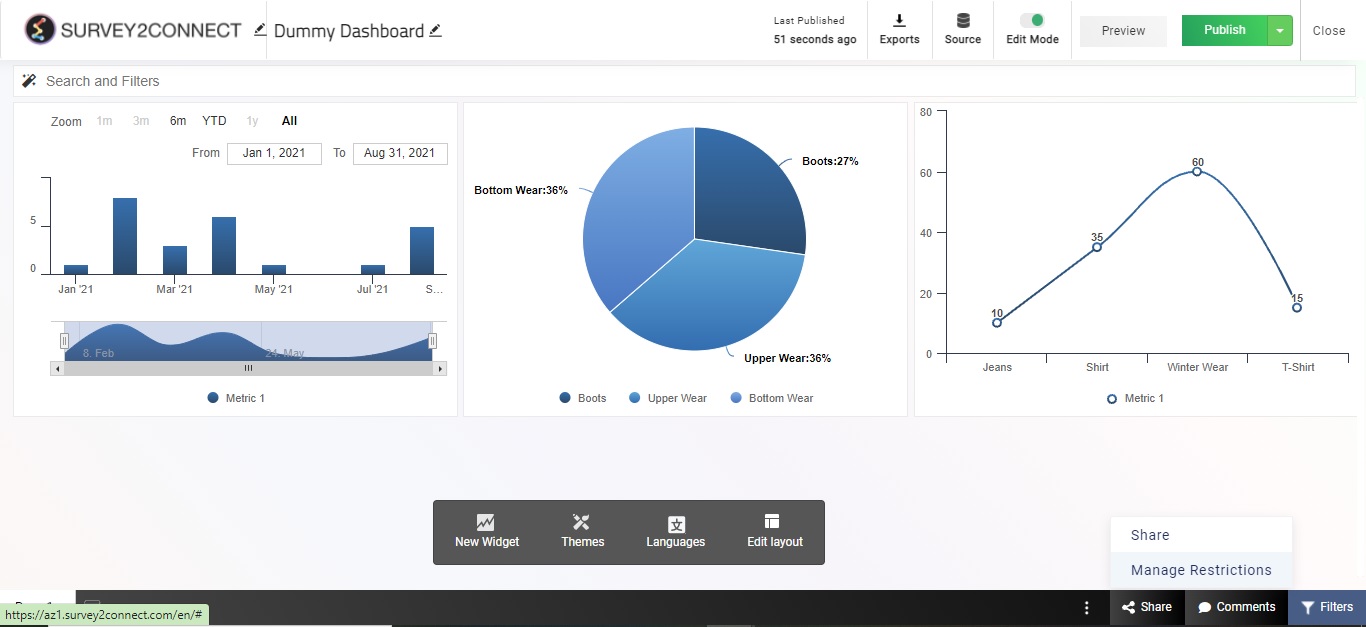
1. Click on the Share button at the bottom of the screen and click on Manage Restriction.
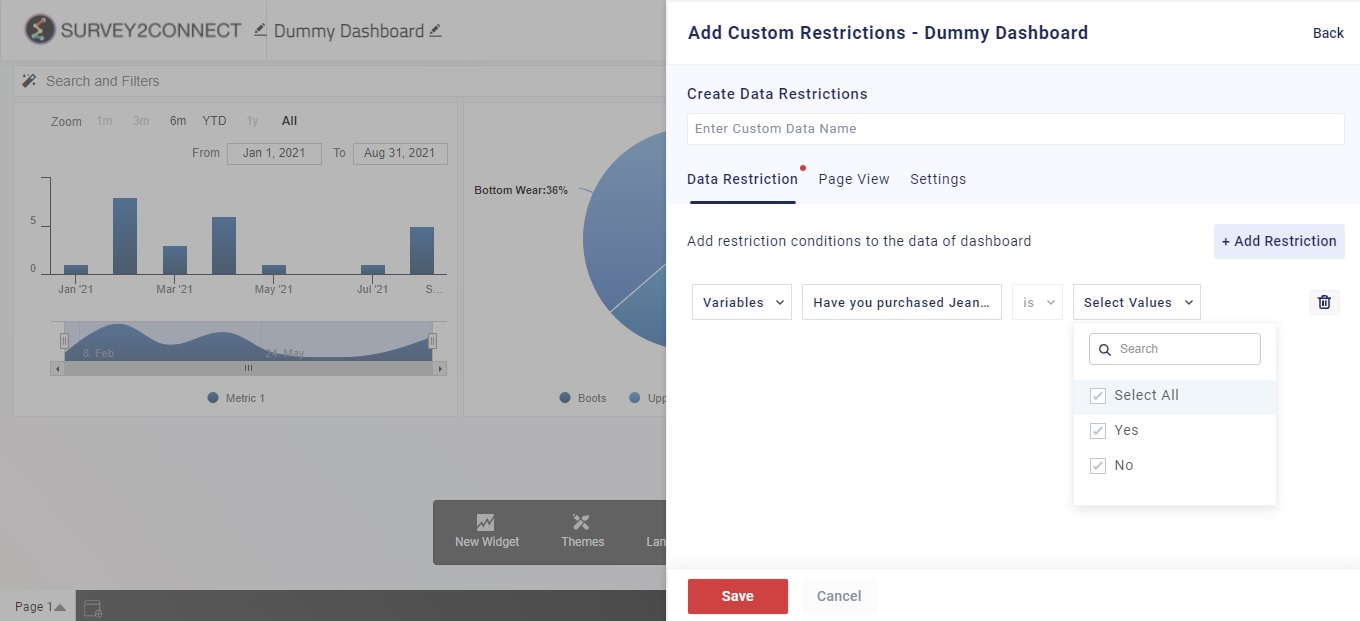
2. Click on +Add Restriction
3. Enter the name for the restriction and then select the Data Type in the Data restriction tab. Data type lets you create the condition on which the restriction would be activated. You have multiple options to choose from — Variables, Surveys, Collectors, Collector Type, Response Status, End Date, Start Date, Response Duration. Once you have selected the data type, select the operator and value to make a condition. The data type and subfield that you chose here would be restricted to the user getting access to the Dashboard. Let’s say you select a collector type as restricted data, the user would only see the dashboard with the data barring the restricted data.

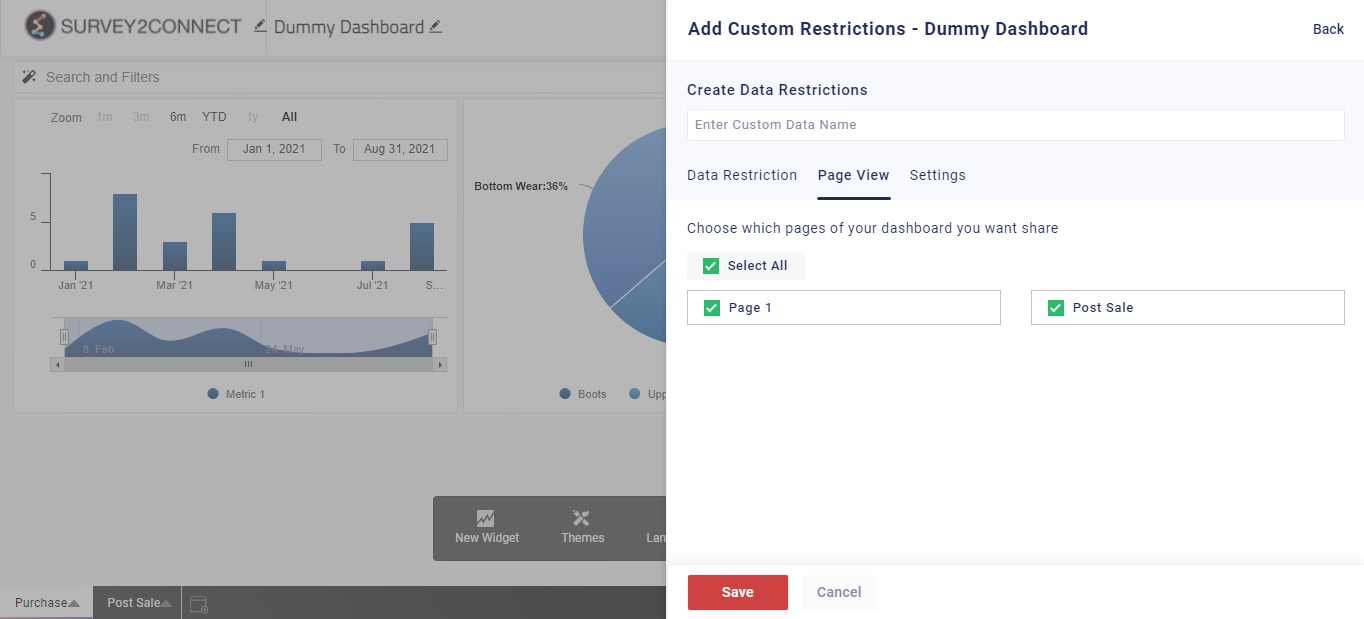
4. In the case where you just want to have restrictions on page view, you can switch to the page view tab and select the pages that would be shown to the user who gets access to the Dashboard.
5. Go to the settings page to manage the settings of the restriction. Manage the settings and click on Save to save the restriction which can be selected while sharing the dashboard.

Data Types available
When creating a condition for the restrictions, you can select one data type from the list of the options available:
- Variables: This lets you select questions from the surveys added to the dashboard. You can use the answer choice of the selected question as variable
- Surveys: This lets you select the survey on the basis of which the dashboard is created
- Collectors: This lets you select from all the collectors that were created for the surveys added to the dashboard
- Collector Type: This lets you select collector type from the list of all the collector types available — SMS, Email, WhatsApp, API, Embed, Field Force, Manual Entry
- Response Status: This lets you select from the three response statuses available on the platform — Incomplete, Complete and Disqualified
- End Date: This lets you set an end date for response submission and based on the operator you select for the condition, it would create a condition. Let’s say you want to create a condition that you want to restrict data based on the last 30 days. Select the End date as data type and then select the last 30 days in the operator
- Start Date: This lets you set a start date and similar to that of the End date. You can select the operator and select the time period from where the data would be considered for restriction.
- Response Duration: This lets you restrict data on the basis of the duration it took to fill the response for the survey. You have the option to select an operator to make an equation/condition.
Settings
Dashboard auto-fresh: This option, when enabled, lets you set a time window after which the dashboard would refresh automatically.
Filters menu open by default: When enabled, this option, would automatically open the filter menu.
Public Raw Data Exports: This option lets your user export raw public data. If you disable this, they won’t be able to.
Export Email autofill: If this option is enabled, your users would only have to fill in their password when logging in, their email would be auto-filled.
Show raw data export history: When enabled, you can track the history of all your raw data export in the Exports section of the Dashboard.