

Manage Your Agents

Views
With the Agent page, you can manage all your agents. From creating new agents to managing the agents available, you can make changes to their profile from this section.
Agents are useful in conducting offline interviews using Survey2Connect’s offline app, Field Force. You can assign agents surveys and locations to conduct interviews.
Creating New Agent
You can create a new agent from your admin account with a few easy steps. These agents created help you in conducting surveys in offline mode via Field Force App.
1. Go to the Admin section in your account
2. Go to the Agent section under the Admin page

3. Click on +Add Agent
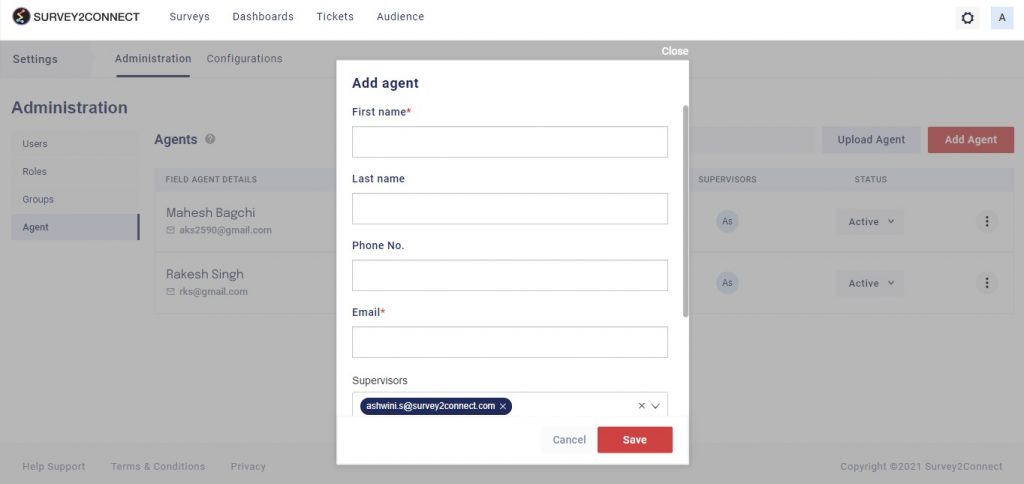
4. Enter Agent’s name, email and supervisor’s email address
5. Enter the password that Agent would use to log into the account
6. Click Save
Note: You can upload the agents in bulk by clicking on +Upload Agent in Agent Page. This would download a template file. Update the file with your agent details and save it on your device. Now upload the file using the Upload Agent button.
Editing Agent Details
You can manage your agents and edit the details of the agent by clicking on the Edit button. Follow these instructions to edit the Agent details
1. Go to Agent Page under the Admin section
2. Click on the Edit button under the action tab for the agent you want to edit
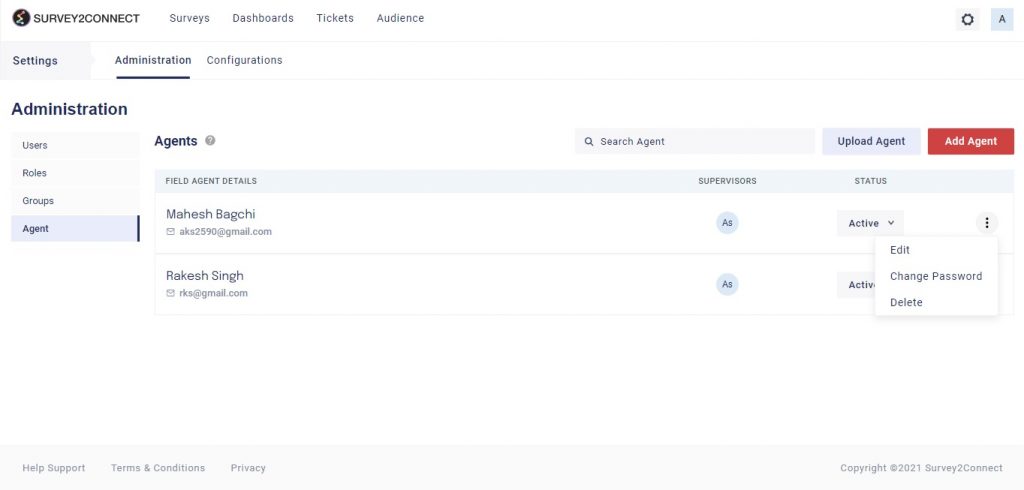
3. Make changes to the agent details and click Save

Change Agent Password
You can change the password of an already created agent. Follow these steps to do the same.
1. Go to the agent page
2. Click on the edit button of the Agent Profile
3. Click on Change Password
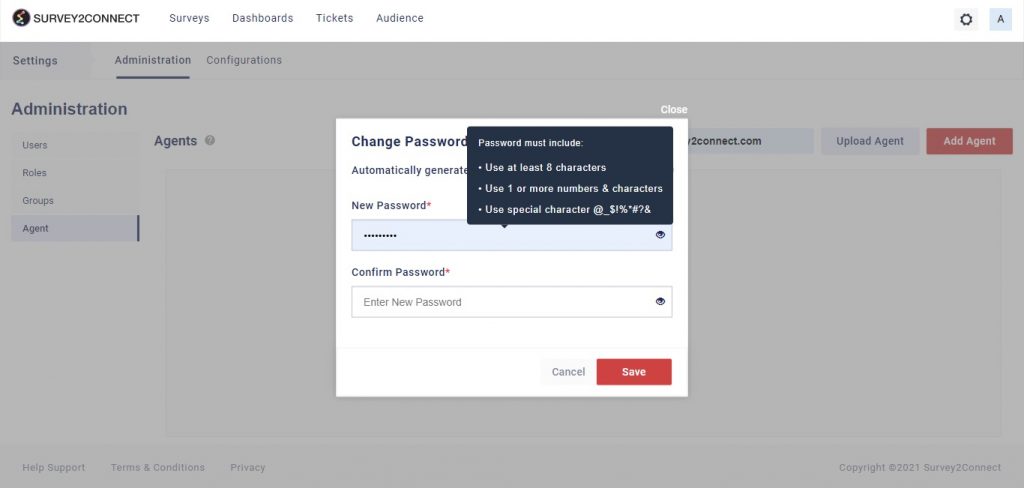
4. Either enter the new password or click on Automatically Generate Password
5. Click Save. In case, you have selected automatically generate password, the new password would be shown on the screen.
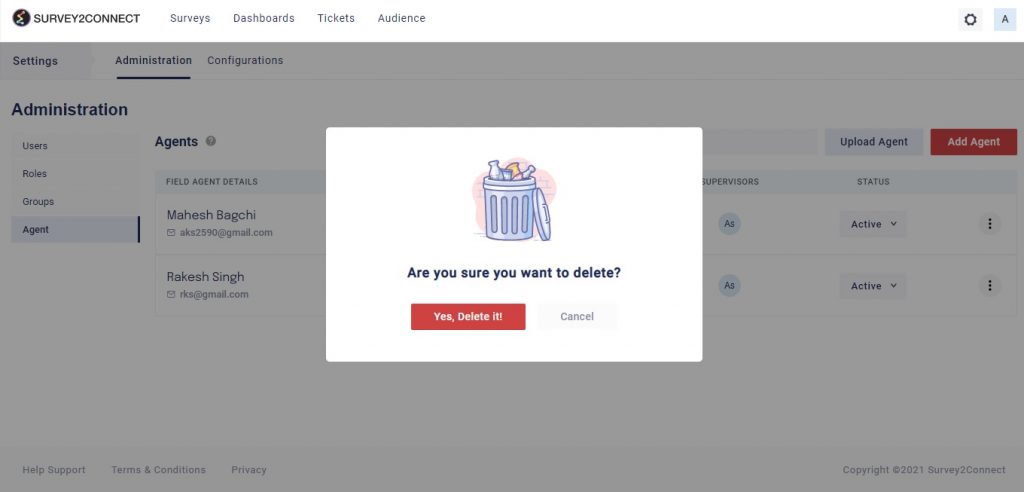
Delete Agent
You can also delete an agent from your account. Follow these steps to delete an agent:
1. Go to Agent Page under the Admin section
2. Click on the Delete button under the action tab for the agent you want to delete
3. Click on Yes on the popup box
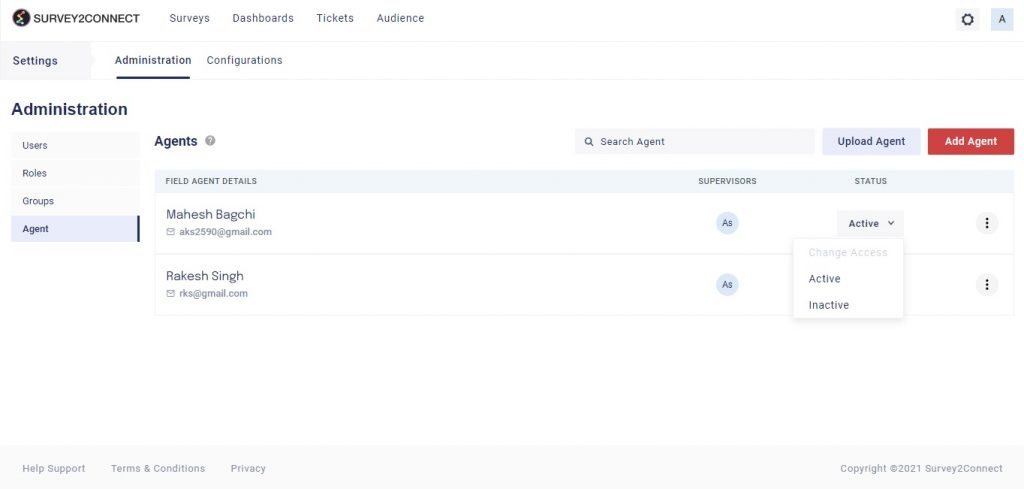
Make An Agent Inactive
You can make an agent inactive from your list. Once you do that, the agent won’t be able to conduct surveys. Under the actions tab for the agent, click on the Agent Active Status button. If it shows green, it means the agent is active. Click on the button to make the agent inactive.
Upload Agent In Bulk
You can upload multiple new agents in bulk. This feature saves you from having to manually add a new agent every time. The steps for uploading agent in bulk are fairly simple and easy to follow. You would need to upload an excel file and your agents would be uploaded to your account.
1. Go to the Agent page under the Admin section
2. Click on Upload Agent
3. Download the template file from the popup
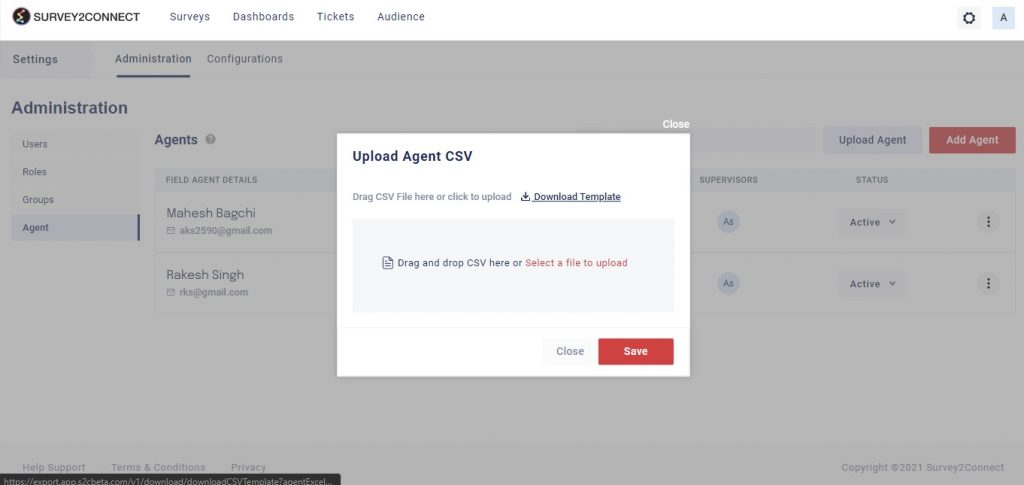
4. Edit the excel file and upload
5. Click on Save