

Managing Your Account

Views
Survey2Connect’s platform allows you to create, share and analyze DIY surveys by signing in on our platform. Once you have logged in, the homepage of SUrvey2Connect offers a plethora of features for you to use to create and share your survey. Before we proceed with managing your account, check out the features available.
Features available to you on home screens are:
Surveys
This option lets you see and manage all the surveys you have created. All the surveys you create in the future would be reflected here. You can click on View to open the survey and edit. You can also access the response collector and analyze section from here. You can also disable and delete the survey from this page.
Manage Surveys
The manage Surveys option allows you to manage all your existing surveys. You can check all the surveys you created and the surveys you shared with other people in your team or organization. You can also check the Libraries you have created and Deleted Surveys.
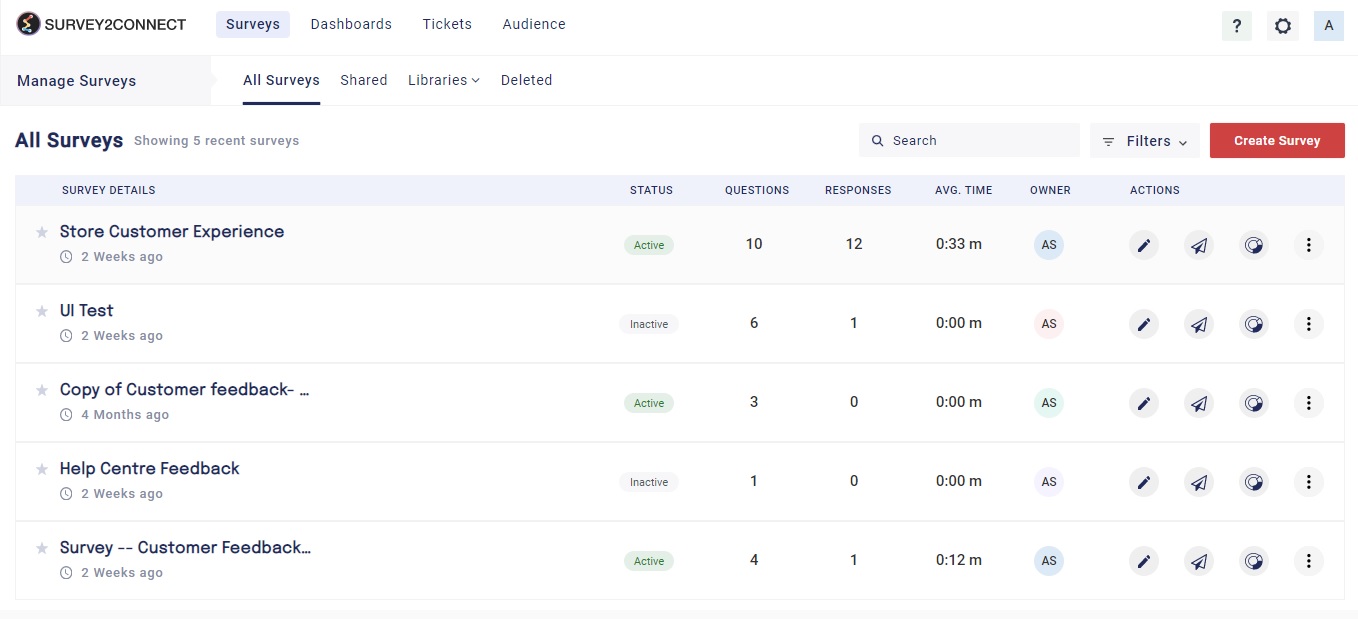
All Surveys
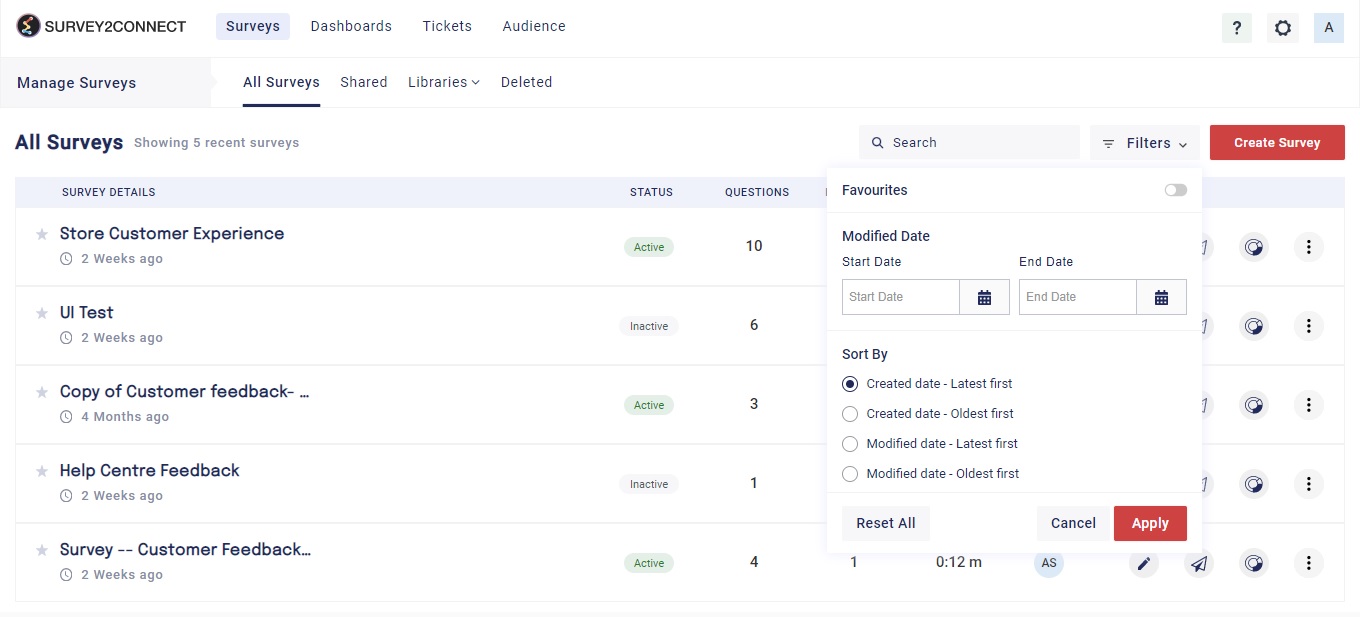
This section shows you all the surveys available on your account. You can manage your individual survey from this page by clicking on the three action options button on the right side of each survey. You can also use filters to sort your surveys. The available filter options are
-
- Modified Date: You can set the start and end date and only the survey within the time period would be shown
- Sort By: Using this option, you can sort your survey list on the basis of 4 available option — Created Date -Latest First which will you show you the most latest create survey at the top, Created Date — Oldest First which will show the oldest survey at the top, Modified Date – Latest First which will show you the survey which was modified recently at the top and the last option is Modified Date – Oldest First which will show you the survey which was modified the longest time ago.
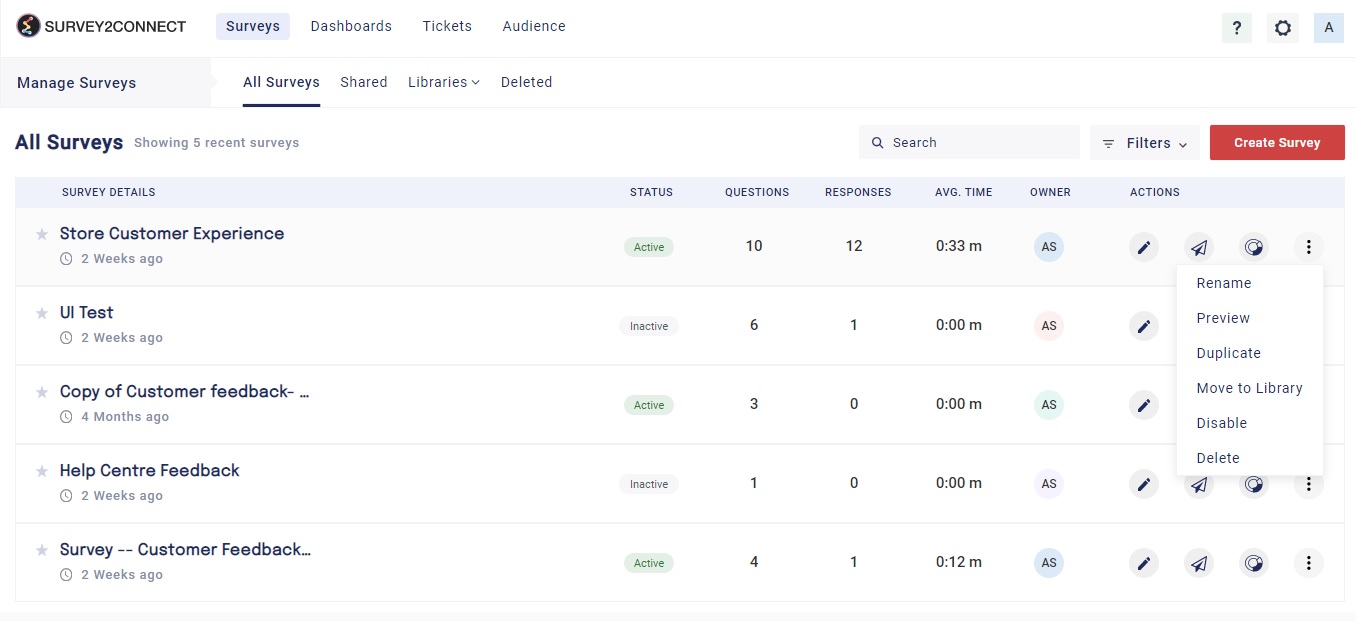
You also have the option to take some actions under the actions tab. You get three buttons and more options using the options button. The three buttons are
-
- Edit: You can click this button to edit the particular survey
- Collect Response: This would take you to the Collect Response section from where you can create a collector to get responses from your customers.
- Analyse Result: This would take you to the Analyse Result tab from where you can analyze the survey responses and perform further actions.
The other options under Action Tab are:
-
- Rename: You can rename your Survey using this option
- Preview: This option lets you preview your survey. The preview shows you how your survey would look to respondents.
- Duplicate: This option creates a copy of your survey
- Move To Library: You can move the survey to the library using this option. This option is useful when you wish to share your survey with edit rights to other users in your team.
- Disable: This option would disable your survey, which means if the survey is live, it will be disabled and users won’t be able to fill it and you won’t be able to share it further.
- Delete: This would delete your survey from the list and send it to the Deleted Section
You can also check the Average Time of each survey. It shows you the average time taken by respondents to fill your survey.
Create Survey
This option lets you create a new survey. You can choose from different survey types and you can either create a new survey from scratch, use existing templates offered by S2C or you can create a new survey from an existing one.
Shared
This option shows you all the survey you have shared within your organization or with your team. You can similarly manage all these surveys individually.
Libraries
You have the option to save surveys in your library to be shared with others in your team. All the surveys saved in your library can be accessed from the library section here. Click on Library, go to the folder where the survey is saved and click on the survey you wish to open.
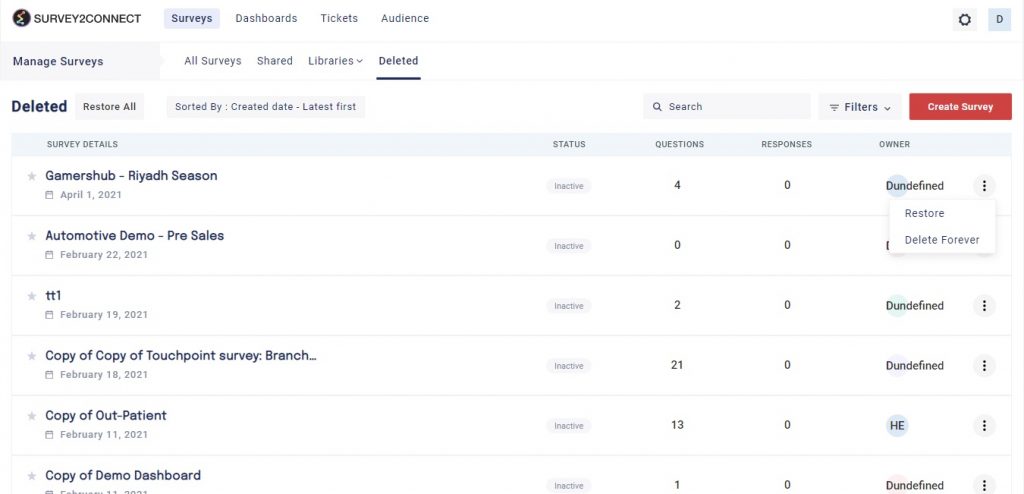
Deleted
This option shows you all the deleted surveys on your account. You have the option to delete a survey, however, the deleted surveys can be accessed from this page. You can either choose to delete it forever or restore it back to your account using the options button under the Owner tab of the status.
Dashboard
Survey2Connect dashboard functionality allows you to create widgets based on your survey responses. You can access Dashboard features from the home screen of your account. If you want to read more about Dashboard, click here.
Tickets
Ticketing functionality is used to generate a ticket based on a negative response from a respondent in the survey. You can create your ticket rule and criteria and based on it a ticket would be generated that can be viewed and resolved by the concerned team. Click here to read more about how the Ticket system works.
Account Settings
This option lets you control and manage your account as an admin. You can add contacts, assign roles and targets for your team and field agents. Assigning roles and targets help your team streamline the process of survey creation and analysis. Click here to read more about it here.